Installing Termination Boards
Four termination boards need to be added to each stave side.
Instructions
Find sheet of termination boards in the dry cabinet.
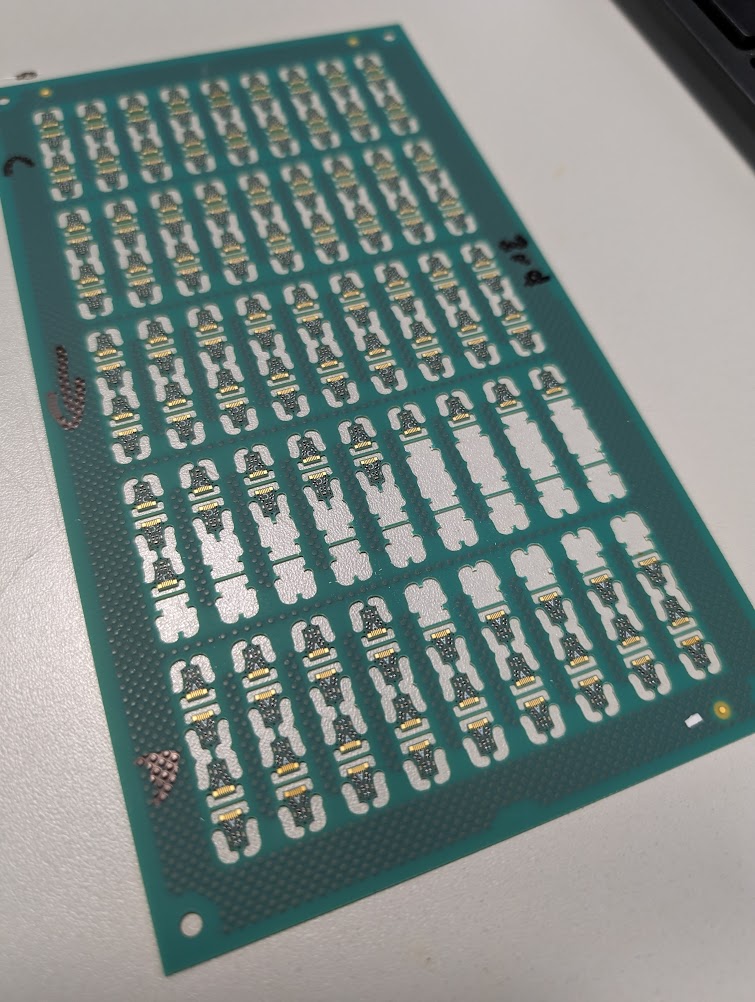
Note that on each there is a letter A or C. Cut out one A and four C termination boards using a scalpel or cutters. Note the bridges holding each board onto the sheet have a little hole in them - this is where to cut.

Pick up the termination boards using tweezers. Apply adhesive (unloaded Hysol) to the back of each board - one drop on each.
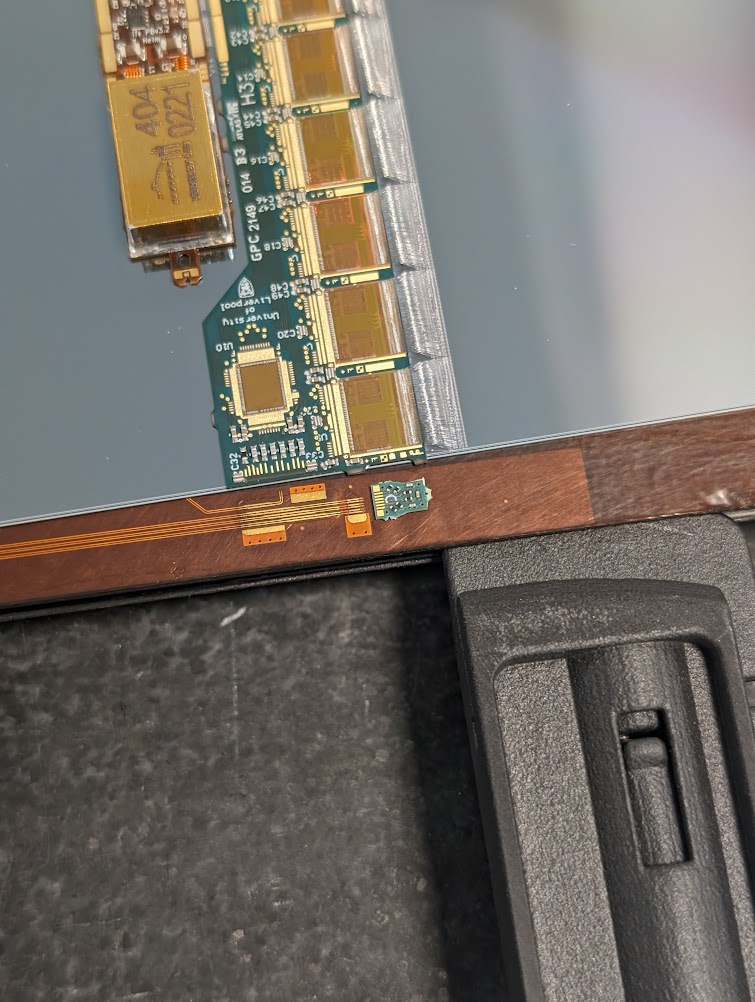
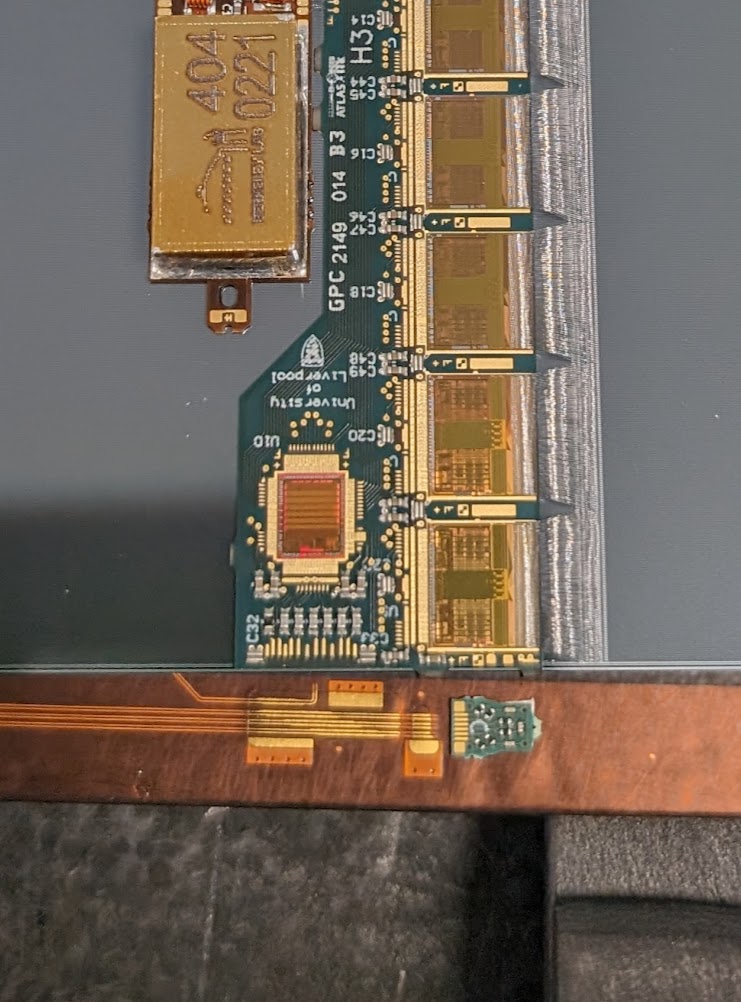
The three C boards need to go at the bottom of modules 0, 4, 12 and 13, lining up the gold stripes with the lines on the bus tape as shown in the photo below. Be careful not to touch the modules as you are placing the termination boards down. You can use one set of tweezers to position the termination board and a second set to gently press it down.
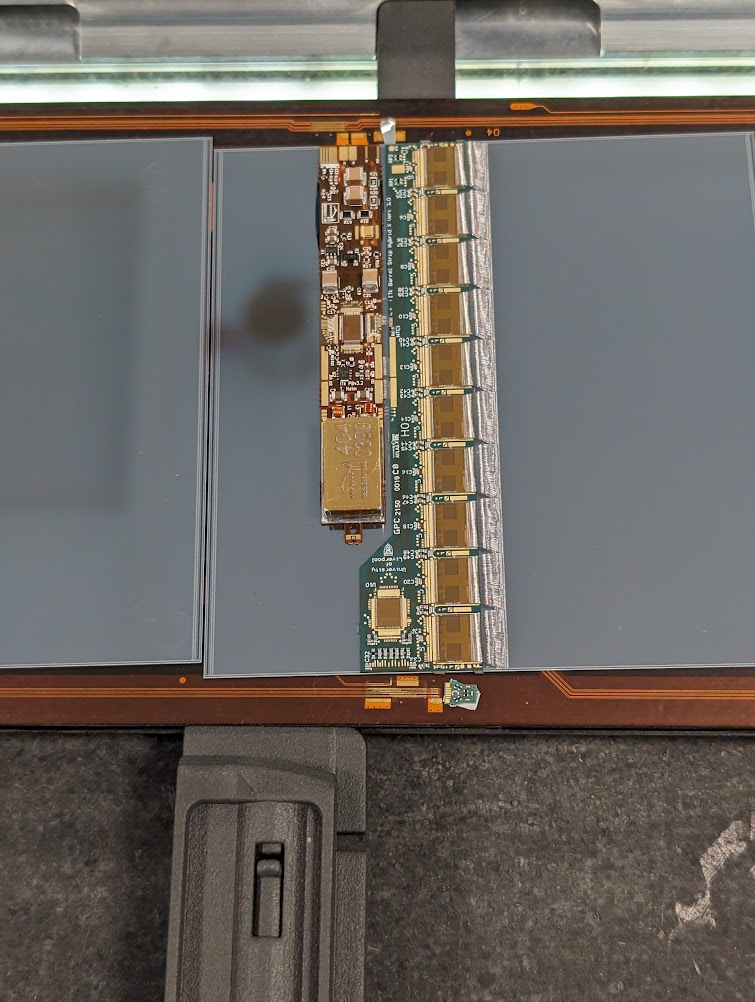

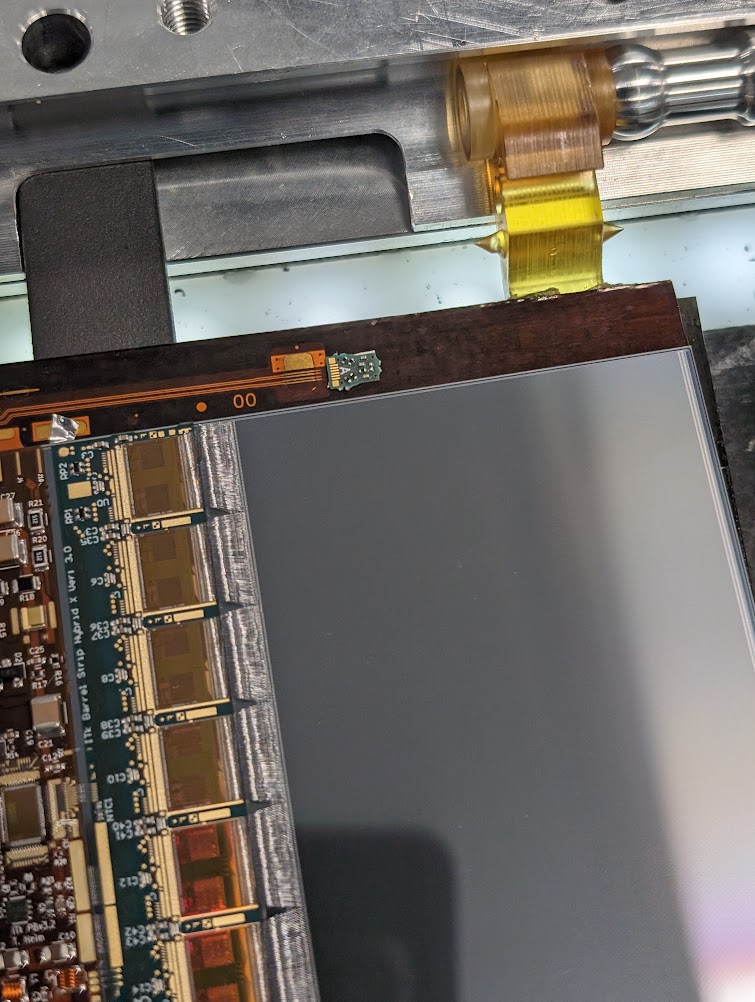
Board A needs to go at the top of module 0 nearest the first lockpoint, lining up the gold stripes with the lines on the bus tape as shown in the photo below. Be careful not to touch the modules as you are placing the termination board down.